How to Create a Low-Waste Kitchen Shelf in a Small Rental
Low-waste kitchens in photographs tend to look built rather than lived in: bespoke drawers, wall-mounted dispensers, a labelled jar for every legume. In a rental with two metres of counter and a shelf that came with the flat, that version is not on offer. The good news is that one shelf does most of the work by itself. Give it a clear purpose, fill it with jars you genuinely refill, and the rest of the kitchen slowly follows. No drill, no deposit at risk, no conversation with the landlord.
Start with the shelf you already have
The instinct is to buy containers first. Resist that for a fortnight. Empty the shelf completely, put everything on the table and look at what is actually there. You will probably find three open bags of the same rice, a jar of something bought for a single recipe, and a bag of lentils held shut with a peg. That is the real starting point: not a storage problem, a duplication problem.
Measure the depth of the shelf and the gap above it before spending anything. A jar that only fits at an angle will not get used, and a shelf that is too deep quietly swallows things at the back. Keep the eye-level shelf for what you cook with weekly and push backstock up or down.
Then add support, not renovation. A wire riser doubles the usable height of one shelf. A small turntable makes the awkward corner reachable. An under-shelf basket that hooks over the front edge can hold cloths, a pen and the small tools that otherwise drift across the counter. Removable adhesive hooks are fine for light things if you follow the removal instructions and test one in a hidden spot first — paint and deposits are worth more than a tidy corner. None of this needs a drill, and all of it comes with you when you move.
Jars that earn their place
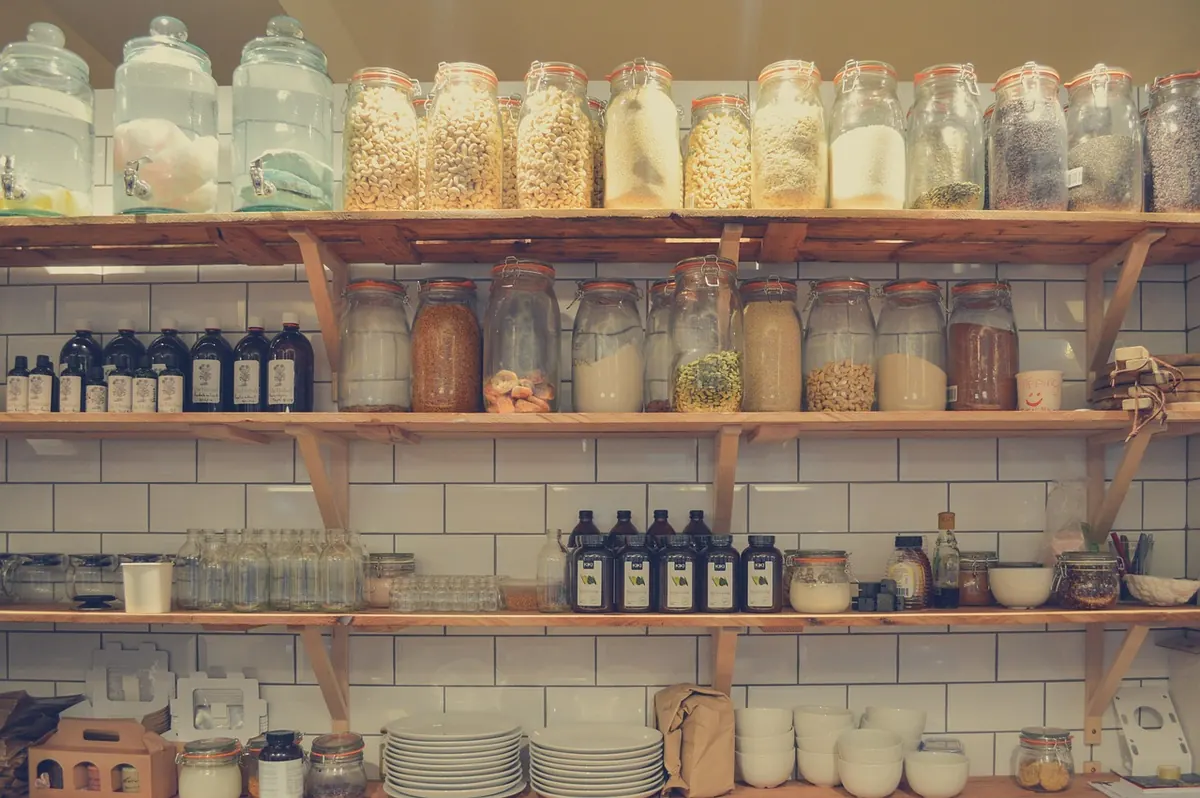
You do not need a matched set. You need jars that are easy to open, easy to fill and hard to lose the lid of. Wide mouths and straight sides matter more than looks: a measuring cup should fit inside, and a spoon should reach the bottom. Choose one or two sizes so the lids interchange, then reuse what the kitchen already produces — sauce, honey, pickles, olives. Soak the labels off in warm water with a little bicarbonate of soda, and dry the jars thoroughly before filling.
Airtightness is what makes the system work. Flour, oats, sugar, coffee and anything that goes stale or attracts pantry moths deserve a proper seal; pasta and lentils are more forgiving.
Keep the information, lose the packaging
Cut the cooking instructions and allergen notes off the packet before it goes out, and tape them inside the cupboard door. Or write straight onto a strip of masking tape: rice — 1 cup to 2 cups water, 12 minutes. Keep the tape and a marker on the shelf and labelling becomes a ten-second job instead of a project.
What not to decant
Anything you use once a month and would have to guess about later. Spices keep better in small jars, so decant only what you will finish in a few months and leave the rest sealed. And if an allergen warning matters in your household, keep the original packaging where you can still read it.
Build a refillable staples list
A working shelf is short. If it holds everything, it holds nothing well. Start with what you cook most and buy in amounts you can realistically finish:
- Oats — one jar, or two if you keep fine and jumbo separately.
- Rice, pasta, couscous — separate jars, because a mixed jar turns every meal into a decision.
- Lentils, chickpeas, dried beans — the backbone of cheap, low-waste cooking.
- Flour, sugar, salt — the largest jars, filled with a couple of months' worth at most.
- Coffee and tea — a small jar, refilled often; freshness beats volume.
- Nuts, seeds, dried fruit — small jars, kept out of direct sun if your shelf faces a window.
- Oil and vinegar — dark bottles with a pourer, refilled rather than replaced.
- Spices — tiny jars, bought loose, labelled with the month.
At the refill shop
- Wash and dry the jars the night before. Damp jars cake the oats and the flour.
- If the shop asks you to subtract container weight, write it on the lid with a marker before you go.
- Take cloth bags for produce and a sturdy box for the walk or the bus home.
- Buy less than you think you need. First visits tend to be overambitious, and a shelf packed to the front is harder to keep tidy than one with a little air in it.
- Fill the jars the same day, while the bags are still in your hands.
The habits that keep a shelf working
Containers do not reduce waste; the routine around them does. Five small rules cover most of it.
- Decant on arrival. A bag left on the counter "for later" becomes clutter within a day.
- Old in front. New stock goes behind, so the tail end of the last bag gets used first.
- One in, one out. Nothing new comes onto the shelf until something leaves it.
- Keep a use-first box. A small basket for the last of the oats, the half-jar of seeds, the open packet of pasta you want gone this week.
- Write the date. Contents and month on the lid, in marker, every time.
Then give the shelf five minutes before you shop. Wipe it down, check what is nearly empty, and note it on your list — an empty jar is a shopping list item, not a reason to buy a new one. If moths have ever found your cupboards, keep grains in properly sealed jars, check opened packets before decanting, and consider chilling flour for a couple of days after buying it, a common precaution in moth-prone kitchens.
When there is no refill shop nearby
Plenty of towns still have no bulk store, and the shelf works anyway. Buy the largest size you will actually finish, and split a sack of rice or flour with a neighbour when the bulk price is too good to ignore. Choose glass, tins and cardboard over composite bags where you can, and reuse the glass. Buy loose produce rather than pre-packed trays, and take cloth bags to the market.
In the kitchen, leftovers go into jars and bowls with a plate on top instead of cling film; bread keeps in a cloth bag; half a lemon lasts longer in a small sealed jar in the fridge. If your council or local supermarket collects soft plastics, keep a small bag for that and check the rules where you live, since they vary. Rinse containers before recycling — a rinsed jar is recyclable, a greasy one often is not — and resist the urge to nest everything inside each other, which sorting facilities dislike.
A shelf that suits the flat you are in
Keep the project small enough to live with. One shelf, six to ten jars, a riser, a marker and a use-first box will do more in a month than a full pantry overhaul you abandon in a fortnight. Photograph the shelf when it looks right, so you know what "reset" means, and give it a proper review after four weeks: which jars are always empty, which never move, which are too big to lift comfortably. Move the ones that do not earn their place up to backstock.
Everything here comes apart in an afternoon and fits a different kitchen on the other side of a move. Measure once more before you buy the jars, wash them properly, and let the shelf take over the remembering.
Photo: Pexels / Pixabay


You Might Also Like
Pot size, uneven watering, late staking and careless feeding account for most disappointing container tomato crops. A practical guide to spotting each mistake early, plus a five-minute weekly routine.
A practical, beginner-friendly guide to choosing a small rain barrel, siting it safely, connecting it to a downpipe and putting harvested rain to work in pots and borders.