The 10-Minute Garden Pest Checklist for Early Summer
Early summer is when the garden stops being a plan and becomes a busy neighbourhood. Everything is putting on new growth at once, and everything that eats new growth has noticed. The comforting part is that at this stage most pests are still local, still countable, and still easy to interrupt. Ten minutes a week, spent in the same order each time, will tell you more than an hour of anxious scrolling through photographs of mysterious leaf damage.
The trick is to treat it as a route rather than a research project. Same direction, same stops, quick notes at the end. You are not trying to identify every insect in the border. You are trying to spot the small changes that mean next week will be worse if you do nothing.
Why Early Summer Is the Telling Moment
By late June and early July, most pest populations are between generations. The overwintered adults have done their damage, eggs have hatched, and the first real wave of feeding is underway. Catch that wave and you often head off the second, bigger one that arrives in high summer when plants are already tired and water is short.
Early summer weather does you two favours and one disservice. Warm, still days make aphid colonies grow visibly in a week — convenient, because you can see them getting worse. Damp evenings bring slugs out where you can find them. But hot, dry spells also favour red spider mite, which is small enough to ignore until foliage is already bronzed and webbed. That is why the inspection needs to be routine rather than occasional. You are looking for the third aphid, not the three thousandth.
The Ten-Minute Route
Go at a steady walk, not a wander. Pick a starting corner and always begin there. In a small garden, do the whole plot; in a bigger one, split it into two halves on alternate weeks. Late afternoon or early evening is ideal, because slugs and snails are starting to move and you can see both the pest and the damage in the same visit.
Carry a small kit so you never have to break the rhythm:
- A phone torch for the undersides and the back of the pot rows
- A sheet of white paper for tapping flower heads over
- A lidded jar or old yoghurt pot of soapy water
- A few small twigs or short canes to mark plants you want to re-check
- A pencil, or a note on your phone, for three lines of record
Leaves, Front and Back
Start at shoulder height and work down. Turn a handful of leaves on each plant over — not all of them, just enough to be representative. You are looking for clusters of small soft bodies at the tips and along the veins, sticky patches, silvery speckling, fine webbing, and the pale mottled trails of leaf miner. Do this on the plants that sulk most: roses, broad beans, courgettes, brassicas, anything in a pot.
Stem Tips, Buds and Flower Heads
New growth is where the sap is sweetest. Squeeze the top few centimetres of stems gently and look at the flower buds from underneath. Blackfly gathers in the soft tips of broad beans and on the flower spikes of dahlias; whitefly clouds up when you brush a greenhouse plant. Tap a couple of flower heads over the white paper and watch for tiny crawlers — thrips and aphids show up well against plain paper.
The Soil Line and the Pot Rims
Crouch down. This is the stop most people skip and the one that pays best. Look for slime trails, chewed lower leaves, and the pale, soil-coloured caterpillars of cutworms curled at the base of stems. Lift the rim of two or three pots and check the drainage holes. Slugs shelter there by day, and vine weevil adults hide in the same places before their grubs start hollowing out roots later in the season. Notched edges on evergreen foliage, especially in pots, are a prompt to check more carefully.
New Growth — the Tender Stuff
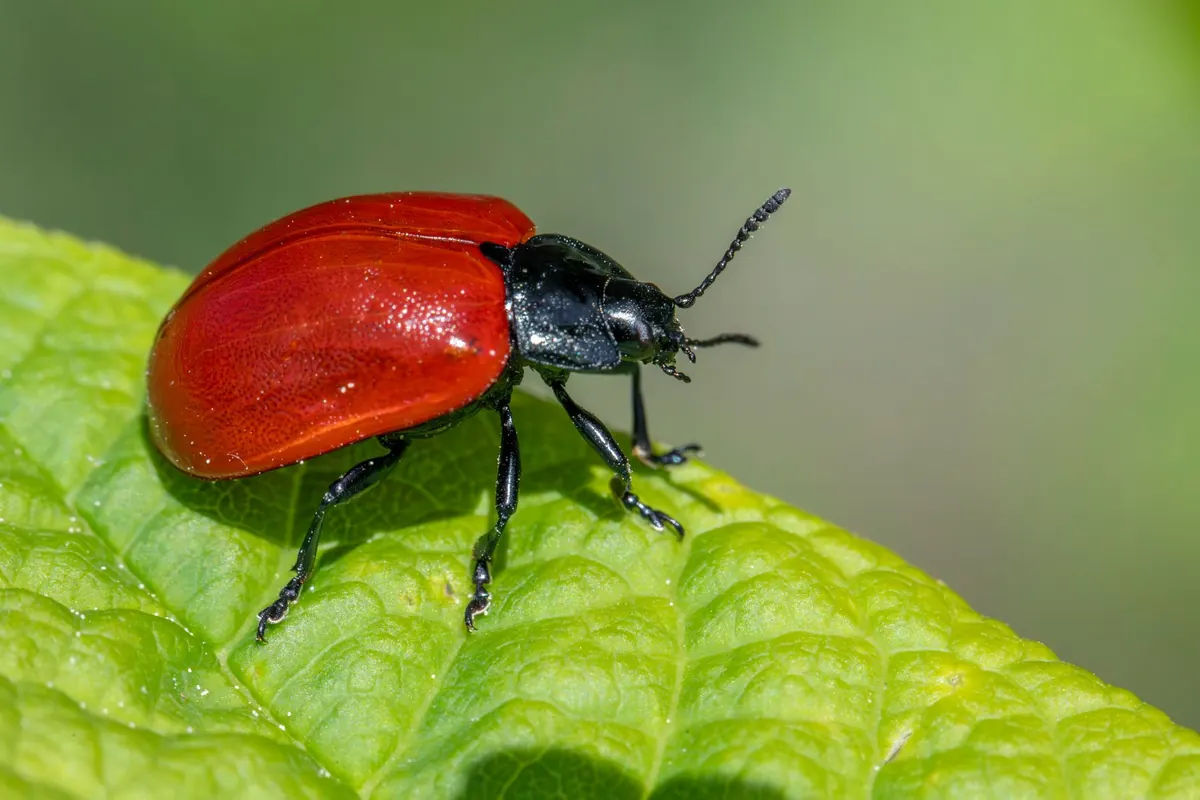
Finish with whatever has appeared since last week: young shoots, seedlings, the fresh tips of shrubs. Caterpillars and sawfly larvae work fast and prefer the softest material. On gooseberries and currants, a stripped shoot in early July usually means sawfly. On box, webbing and bare patches signal box tree caterpillar. Look, too, for the bright scarlet of lily beetle before it disappears into the leaves again.
Reading the Damage
You will often find the evidence before the culprit. A quick translation of common clues:
- Sticky, shining leaves with a sooty black film: aphids, scale or whitefly above — the mould grows on their honeydew.
- Fine pale speckling across a leaf, worse in dry heat: red spider mite, usually on the underside.
- Small round shot-holes in seedling brassicas: flea beetle, most active in warm, dry spells.
- Silver trails, ragged low leaves, seedlings cut off at the base: slugs and snails.
- Winding pale tunnels inside the leaf: leaf miner; usually cosmetic on ornamentals, worth removing on edibles.
- Ants marching up a stem: look for the aphid colony they are tending.
Leave Room for the Good Guys
Before you reach for anything, notice what else is on the plant. Ladybirds and their larvae, hoverfly larvae, lacewing larvae, ground beetles and spiders all do the same rounds you do, and they arrive a week or two after the pest. If you find a colony with predators already working it, a finger-and-thumb tidy of the worst tips is usually enough. Broad sprays kill these helpers along with the problem and often make the next outbreak worse. Spot treatment, not blanket treatment.
Five-Minute Fixes
Most of what you find in early summer can be dealt with on the spot, which is why the inspection stays short and useful:
- Squash aphid colonies on tips with your fingers, or knock them off with a jet of water and repeat in three days.
- Pick caterpillars, lily beetles and sawfly larvae into the soapy jar; check the same plant twice a week afterwards.
- Do a torch patrol after dark on damp evenings and collect slugs and snails by hand — reliable, free, and harmless to everything else.
- Remove and bin badly infested leaves rather than adding them to the compost, especially anything with leaf miner or mite webbing.
- Isolate new suspects. Move an affected pot a few metres away from its neighbours until you know what you are dealing with.
- Improve airflow around crowded plants: thin sowings, tie in floppy stems, water at the base in the morning.
If you do decide to spray, do it in the evening when pollinators are away, choose the least persistent option that suits the problem, and test on one leaf first. Read the label properly — the garden version of a farm product is not the same thing.
When to Watch Instead of Act
Some damage is cheaper to tolerate than to fight. A little nibbling on mature shrubs, a few aphids on a strong rose, leaf miner on a non-edible — none of these justify a rescue mission. Mark the plant with a twig and look again in four days. If the damage has doubled, escalate. If it has not, you have learned something useful about your garden's own balance, and you have saved yourself a job.
The one exception is anything in a pot or a greenhouse. Pests there have nowhere to disperse, no rain to interrupt them and no predators arriving from the hedge, so a small problem can fill the space quickly. Check those plants twice a week through July, not once.
Write It Down, Keep the Route
The final thirty seconds matter more than they feel like they do. Date, plant, what you saw, what you did. Four short lines. Over a summer, those lines become a map of which corner of the garden always struggles and which pest you meet first each year. Next June you will know where to look before you even start walking, and the ten minutes will feel less like a chore than a quick, familiar circuit with real information at the end of it.
Photo: Erik Karits / Pexels
You Might Also Like
Pot size, uneven watering, late staking and careless feeding account for most disappointing container tomato crops. A practical guide to spotting each mistake early, plus a five-minute weekly routine.
A practical, beginner-friendly guide to choosing a small rain barrel, siting it safely, connecting it to a downpipe and putting harvested rain to work in pots and borders.